Vehicle Control Animations
Last updated
Was this helpful?
Last updated
Was this helpful?
Sometimes, it's very difficult to create the right feel (visual feedback) for the player when they are controlling a vehicle, without interfering with the player's control of it. In these cases, it may be useful to animate the body of the vehicle relative to its own root transform, to give the player great visual feedback as to what they are doing.
For example, if you have a spaceship, you may want to animate the spaceship's body to:
Turn slightly in the direction the spaceship is turning, to accentuate the player's control.
Roll slightly in the direction of sideways movement (without the spaceship itself actually rolling).
Provide additional visual feedback during takeoff and landing, without interfering with the spaceship's control behavior and trajectory.
If multiple components are animating the same transform (e.g. the vehicle body) at the same time, this can cause glitches in the animation. To prevent this, the Vehicle Control Animations system has been developed.
The two key components of this system are:
Vehicle Control Animation: A base component for animations, which calculates a local position and a local rotation for a transform every frame.
Vehicle Control Animation Handler: A component that manages all the animations for a single transform, combining the positions and rotations additively and applying them to the transform.
To begin, add a Vehicle Control Animation Handler somewhere on your vehicle, and set the 'Vehicle Handle' in the inspector to the transform you want to animate.
For a physics-based vehicle controller (such as in the Space Combat Kit), the Rigidbody Control Animations component provides many animation options based on the properties (such as velocity and angular velocity) of the Rigidbody.
Add this component somewhere on your vehicle, and drag it into the 'Animations' list in the inspector of the Vehicle Control Animation Handler you added earlier.
On the Rigidbody Control Animations component, customize and experiment with the settings to get the visual effect you're looking for. Each setting is tooltipped to give you a clear understanding of what it does.
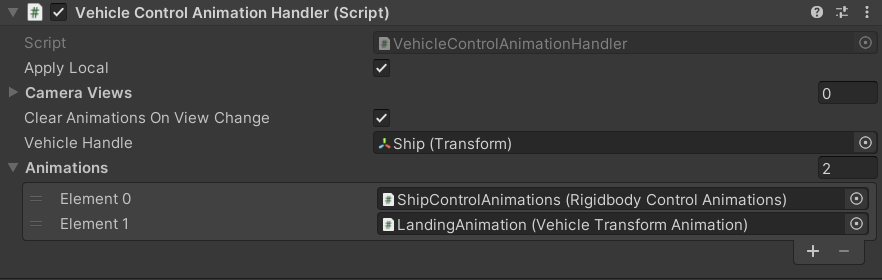
Add all the animations for a particular Transform to the 'Animations' list of the Vehicle Control Animator component. Each animation component must extend the Vehicle Control Animation base class.
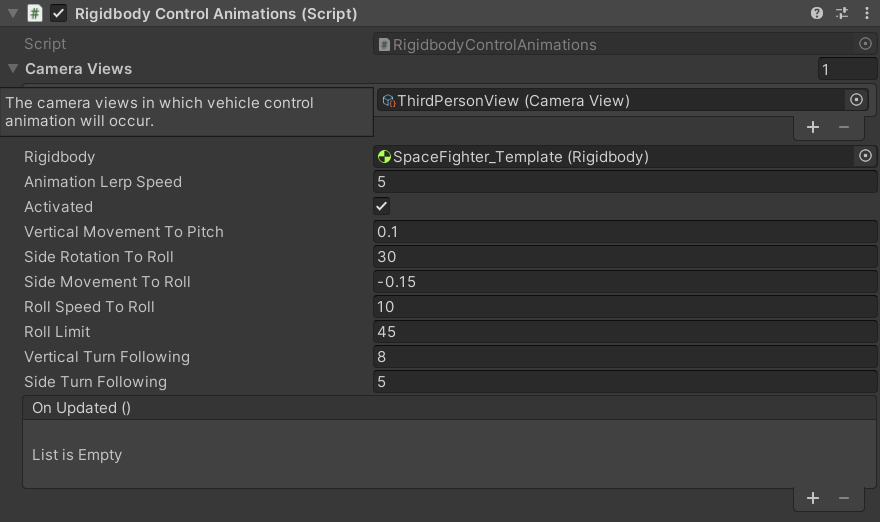
Sometimes you want to add an animation based not on the Rigidbody properties, but to simply play during a specific event. To do this, you can use the Vehicle Transform Animation component.
To get started, add a Vehicle Transform Animation component somewhere on your vehicle and customize the settings in the inspector.
Next, drag the Vehicle Transform Animation component into the 'Animations' list of the Vehicle Control Animator component you added earlier.
Now, whenever you call the Vehicle Transform Animation component's Action() function (which can be added to an existing Unity Event if you wish), the animation will play and be applied to the transform.
To create your own animation component, create a new script that extends the Vehicle Control Animation base class, add it to your vehicle, and drag it into the 'Animations' list of the Vehicle Control Animator component you added earlier.
Next, in your script, calculate every frame a local position and/or a local rotation value for the transform you wish to animate.
Finally, override the GetRotation() and GetPosition() methods to return the values you calculated.
Your animation will now be applied to the vehicle during gameplay!